Overview
In this article, we are going to explain how to edit and space on an AnswerHub community.
Information
Bear in mind that, since this is an Admin action, you have to make sure you are an admin or have admin access before trying to proceed.
To edit space details, perform the following actions:
- Open the AnswerHub Developer Site (Administration Console).
- Under the Content section, go to Site Structure > Spaces.
- Locate the space you want to edit and click the edit (pencil) icon.
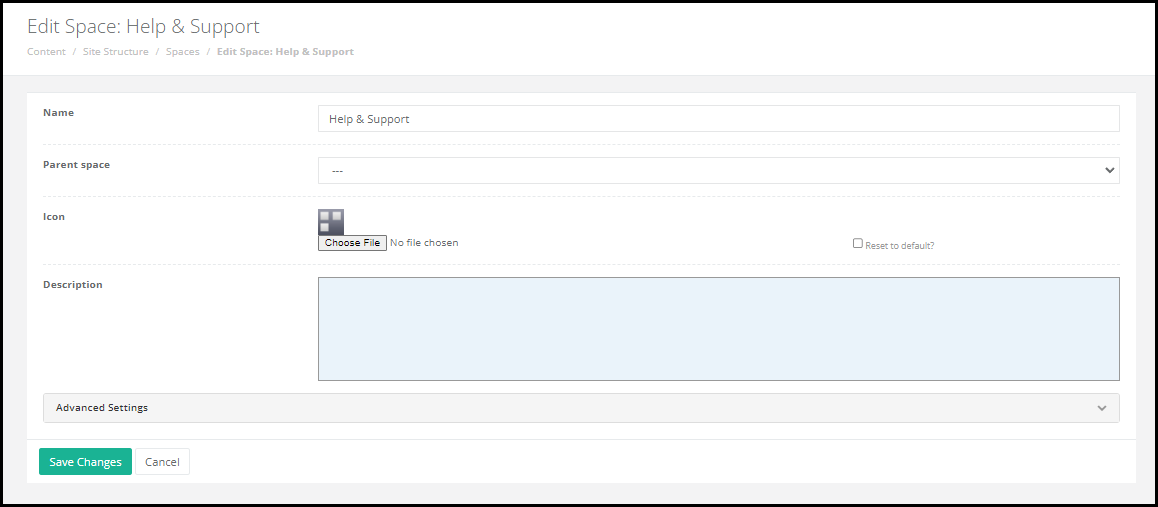
The Edit Space: [Space name] page will display.
- There are four main areas to configure:
- Provide a Name in the text field.
- Select the Parent Space if applicable.
- Set an Icon by choosing a file.
- Provide a Description in the text field.
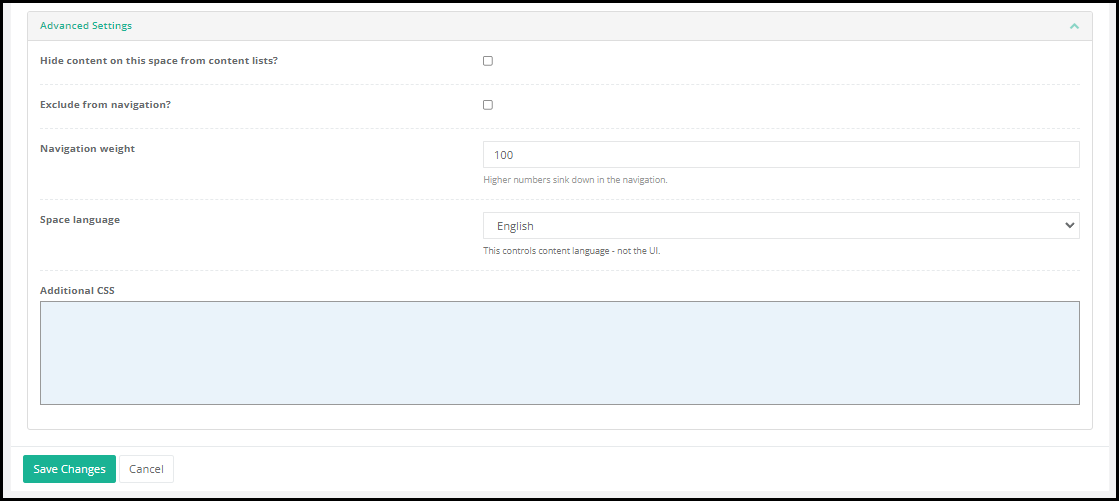
- There are five additional settings that you can configure by opening the Advanced Settings drop-down menu:
- A checkbox to hide content on a space from content lists.
PRO TIP: Check this box for the Help space since the content there relates to AnswerHub and is typically not pertinent to your site's community discussions.
- A checkbox to exclude the space from the navigation.
- A text field to enter a Navigation Weight to determine the position of the space in the navigation list.
Smaller numeric values will appear higher up in the list, while larger numeric values appear lower in the list.
- A drop-down menu to select the language for the space.
This option determines the search language for the new space, not the AnswerHub User Interface (UI).
- An Additional CSS field to add a custom CSS for such a specific space.
- A checkbox to hide content on a space from content lists.
- If you have the SEO Support plugin enabled then you will see an additional menu called Meta Descriptions.
- Click the SAVE button to save any changes.


Priyanka Bhotika
Comments